In this step-by-step guide, we'll walk through how to easily integrate FCM in your iOS application:
NOTE: This is a sample guid repo to integrate Firebase Cloud Messaging (FCM) in your iOS application using Swift with UIKit. If you are working with Objective-C or SwiftUI, you can still take it as a reference to integrate push notifications into your iOS application.
STEP 1 : Create a new iOS app using Xcode with push notification capability enabled
First of all, let’s create a new Xcode Project.Navigate to your project and select the target that you wish to add push notification for.
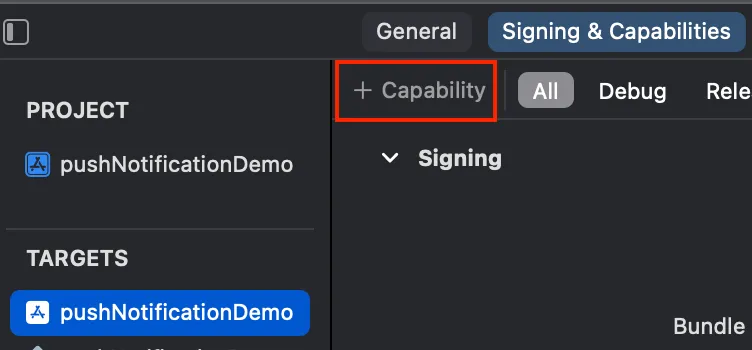
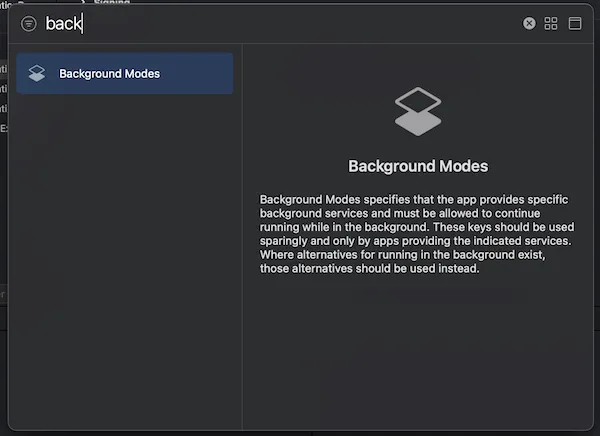
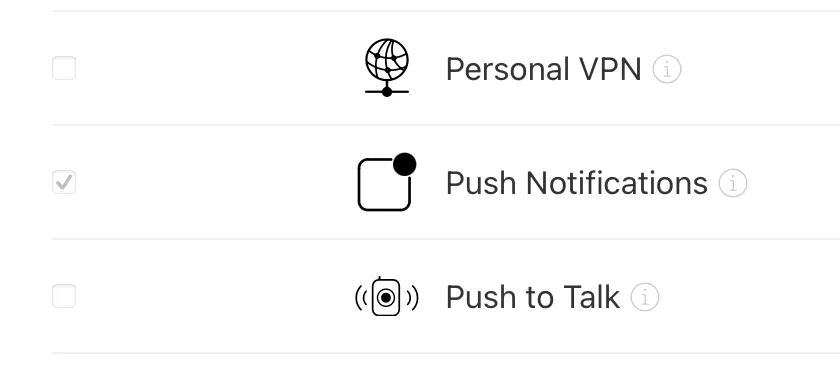
Click on Capability and add Background Modes and Push Notifications.
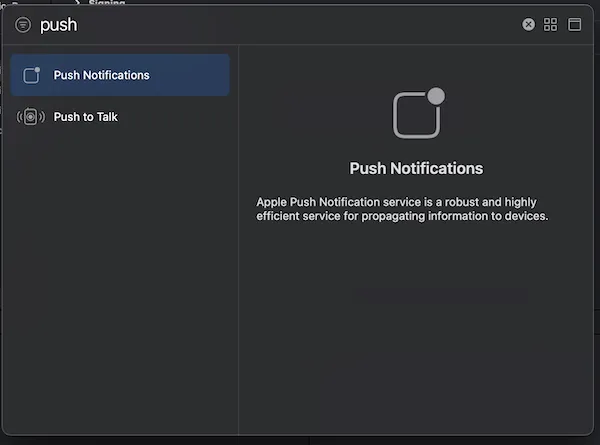
If you can not find Push Notifications, it might because you are on a free Developer Program account. Switch to a paid one, and you should see it showing up. Check Remote notifications.
If you have Automatically mange signing selected like below, you should see your app showing up with push notification service enabled on your developer account identifiers list.
STEP 2 : APNs authentication key
Having push notifications enabled for our Xcode project, we can now move onto creating a private key with APNs enabled. This new way of using private key to access and authenticate communication with APNs is a lot easier to use compare to the old way of setting up for push notification, ie: signing your app, getting an identity ID, and managing your certification.
You can use this APNs signing private key for multiple apps. The signing key works for both the development and production environments and the signing key doesn’t expire.
Follow the steps below to create a private key
In Certificates, Identifiers & Profiles, click Keys in the sidebar, then click the add button (+) on the top left.
Enter a unique key name.
Select the checkbox next to the Push Notifications, then click Continue.
Review the key configuration, then click Confirm.
Click Download to generate and download the key.
After that, we will get the key identifier for the private key above.
In Certificates, Identifiers & Profiles, click Keys in the sidebar.
On the right, select the private key to view details.
The key identifier appears below the key name.
STEP 3 : Firebase Set Up
Create a new Firebase Project Creating a new project is really straight forward, we basically go to the Firebase console, and click Add project. If you would like to know your app performance, you can choose to set up Google Analytics for your project, but everything would work fine without it.
Register App with Firebase
Now having our private key with APNs enabled and the key identifier for the app as well as the Firebase project created, let’s add our app to the Firebase project we created above.
Go to the Firebase console.
In the center of the project overview page, click the iOS+ icon. You will see the following showing up.
Enter the app info and click on Register.
Add Config file to Project
After entering the app info, you will be able to get your GoogleService-Info.plistwhich is your Firebase Apple platforms config file (GoogleService-Info.plist).Move this config file into the root of the Xcode project and add the config file to all targets.
Add Firebase SDKs
We will be using Swift Package Manager here but you an use Cocoapoda or Carthage if you like.
In Xcode, navigate to File > Add Packages.
Enter the package URL: https://github.com/firebase/firebase-ios-sdk
Select latest SDK version
Choose the Firebase libraries you would like to add. FirebaseMessaging is needed for Push Notification.
Upload Private Key to your Firebase Project
Inside the project in the Firebase console, select the gear icon, select Project Settings, and then select the Cloud Messaging tab. In APNs authentication key under iOS app configuration, click the Upload button. Open your private key file and add the key Identifier for it. Click Upload to finish.
STEP4 : Initialize Firebase in App
In your AppDelegate , add the following imports at top.
We will then register for remote notifications in func application(_application: UIApplication, didFinishLaunchingWithOptions launchOptions: [UIApplication.LaunchOptionsKey: Any]?) like following:
This will show a permission dialog on first run. If you would like to show the dialog at a some other time, move this registration accordingly.You can access the registration token via FIRMessagingDelegate'smessaging:didReceiveRegistrationToken: method.
Here is where you might want to send your user data to your backend server.Also, below are the cases when a register token might change so you might want to update your user database accordingly.
The app is restored on a new device
The user uninstalls/reinstall the app
The user clears app data.
Putting everything together, our AppDelegate will look like following.
NOTE: You might want to create separate file or extension to handle push notification related things to do more modularise work. You can see example work in this repository.
Testing
In the Firebase console, open the Messaging page and select Create your first campaign. Send a test message following the steps below.
Select Firebase Notification messages and select Create
Enter the message text
Select Send test message from the right pane.
In the field labeled Add an FCM registration token, enter the registration token you obtained in a previous section when you run your app.
Select Test.
You should now see your push notification showing up on your Device!
Read the full article and download the payload files on Gitlab: https://gitlab.com/aampe/ios-push-notifications/-/tree/dev/AampeNotifications?ref_type=heads
Firebase Cloud Messaging (FCM), a Google service, enables developers to send push notifications to devices using Android, iOS, and web platforms. Leveraging Google Cloud Messaging (GCM) for its core messaging functionality, FCM enhances this with features like targeting specific groups of devices and confirming message delivery. It supports sending messages to offline devices and allows for the inclusion of custom data in messages.


